


One of the big highlights of AMD processors (and an important way in which team Red closes in Intel’s gaming performance advantage) is the ability to overclock just about any AMD processor on just about any motherboard. BIOS overclocking has always been a possibility with AMD parts and a hefty OC was about the only way that parts like the FX 8350 and 9370 could compete with Intel equivalents that had a higher IPC.


With the arrival of the Ryzen chips, the performance per clock deficit between Intel and AMD has narrowed considerably. I personally run a Ryzen 5 1600, OC’d to 3.6 GHz (stock 1600X speeds). I can attest to the fact that it’s a notable upgrade over me earlier Core i5-4440, and the overclock takes things a notch further. I’m personally comfortable with BIOS overclocking. It’s the easiest way to have your clocks set at launch time.


However, it’s definitely not for everyone: BIOS OCs can cause system instability and boot failure. If you don’t want to deal with all this, AMD’s Ryzen Master software is a great alternative. Ryzen Master lets you overclock both your Ryzen processor and system RAM, without having to tinker with the BIOS. The main drawback is that you’ll have to apply your Ryzen Master profile each time you reboot your system. Nevertheless, it’s a completely viable alternative if you don’t want to do BIOS overclocking. Let’s take a look at how it works.
Ryzen 3000 Overclocking Prerequisites


Before we go any further, let’s look at system requirements:
- Do you have a desktop Ryzen processor? It’s important to note here that AMD’s official Ryzen Master tool doesn’t work with mobile Ryzen processors like the 3500U. There are 3rd party alternatives for mobile Ryzen overclocking but all the usual caveats about overclocking laptop hardware apply here.
- Next question: what motherboard are you using? Bottom of the barrel A320 motherboards won’t let you overclock. However, any AM4+ board that’s a B350 and better supports overclocking.
- This is one of the reasons I always recommend opting for a budget B450 or B350 board, even if they cost a bit more than their A320 counterparts. These are the two hardware requirements.
- You’ll also want to be running a recent version of Windows. If you’re set with all that, you can start using Ryzen Master.
Now, most overclocking guides tell you to take things very easy and increase and voltages by tiny increments. I’ve found that the best approach is the exact opposite: Crank things up to the max to find your hard limit, then back off on the clocks and voltages till you get somewhere that’s comfortably stable.

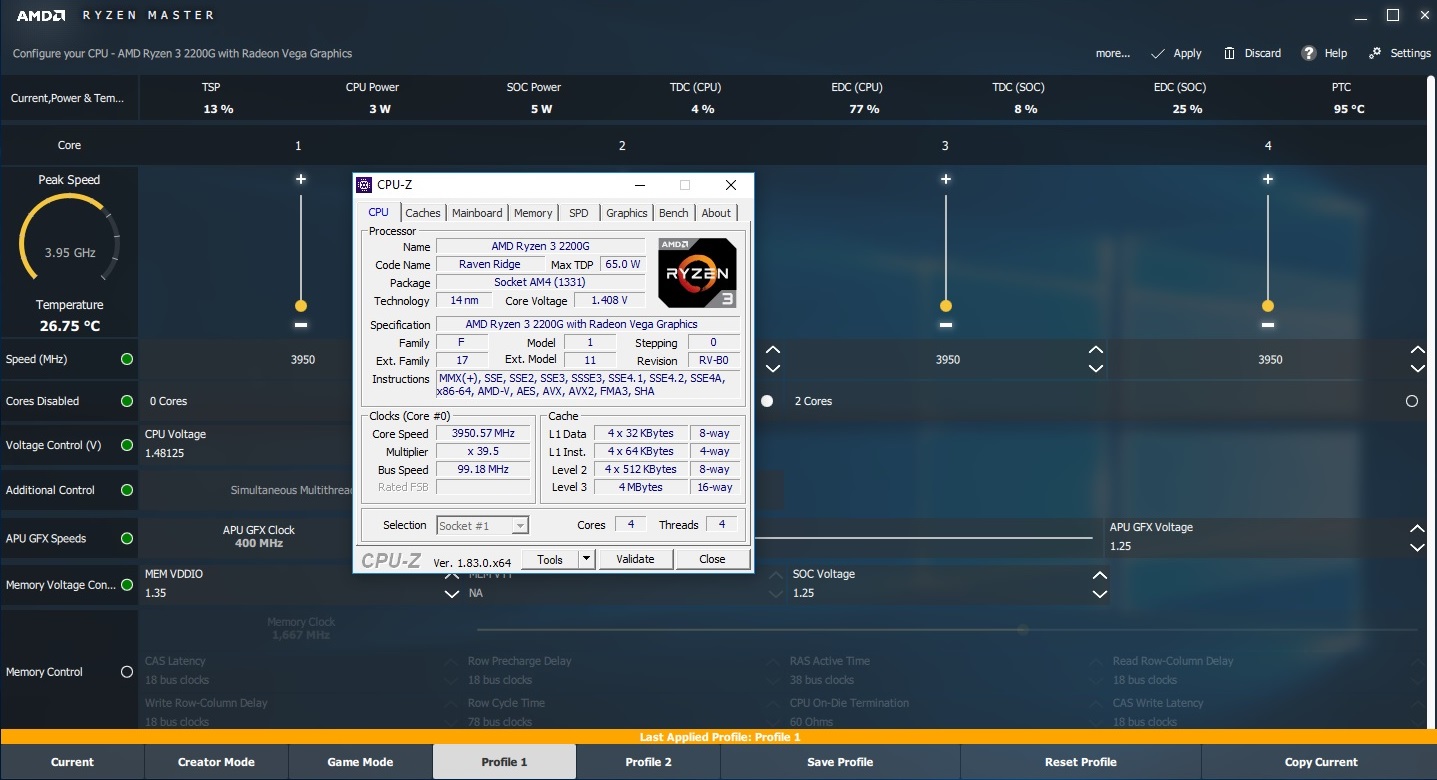
In the main Ryzen Master interface, you’ll find several tabs at the bottom, with “Current,” “Creator Mode,” “Game Mode,” and multiple Profile number. You’ll notice that you don’t get to tweak anything in “Current” mode. That’s because this simply shows you what settings you have at the moment. To start overclocking, pick any of the other profile tabs. All the greyed out controls will be active now. So what are we going to tweak first? Core clock frequencies and voltage.
AMD Ryzen Overclocking Guide

- Set your core voltage to 1.45. Note that this is not the final voltage we’ll be using. This is the highest safe voltage AMD recommends for Ryzen. We’ll be using it to define our hard overclock limits. If an OC doesn’t validate at 1.45v, it’s just not going to work at all, period.
- Next, we’ll be adjusting the core frequency. You can adjust any of the sliders–it’ll cause all the core frequency sliders to go up at the same time. We’re going to bring core frequency up to the maximum typical OC for your part.
- First-gen Ryzen tends to top out at 3.9 GHz. If you’re running a first-gen part, set your Core frequency to 3.9 GHz.
- Second and third-gen Ryzen tops out in the 4.2-4.3 GHz range. I’d recommend setting it to 4.2 GHz. You can go up a bit if you’re feeling adventurous.
- Click apply and that’s it. You’ll have set the overclock. Ryzen Master may ask to restart your system to apply the OC. Do this and relaunch if it does so.
- At this point, you’ll want to download Realbench from here. This is an Asus tool that enables you to monitor CPU stability.
- Install Realbench, set it to use half the RAM you have available (8 GB in my case). Then set it for a 30-minute stress test run. If you’re lucky, your system will get through the run without crashing.
- If it’s a clean run, drop your voltage to 1.42v and repeat the run.
- Drop to 1.4v, then 1.38 and so on in 0.02v increments. You’ll eventually reach a point where your system freezes up. Up your voltage to the last stable value and you’re all set.
Now, if you’re unlucky like me, your processor won’t run stable at a typical Ryzen OC. If your processor doesn’t make it through the first Realbench run at 1.45v, it’s time to drop core frequency. Reduce it by increments of 100MHz and repeat the run with the voltage set to 1.45v. When you get to the point where your system does Realbench without crashing, repeat our earlier instructions about dropping voltage. You’ll eventually get to your OC sweet spot. For me, that’s a rather anemic 3.6 GHz, essentially bumping my Ryzen 1600 up to a 1600X.
That’s really all there is to it. I personally recommend BIOS overclocking since Ryzen Master OCs have to be set each time you reboot. But if you’re not up for that, this is all it takes to eke out some more performance.
Further Reading:
- Best Motherboards for AMD Ryzen 3000 Processors
- Best Gaming PC Build Under Rs. 40,000 in India [September 2019]