

Now that you know why DNS is so important and how the speeds of DNS Servers vary from location-to-location, you may consider changing it to your preference. It’s pretty easy to change DNS, though it varies from device-to-device.
Honestly, the best way is to configure it on the router itself so that you don’t have to change it on every device you own, one-by-one.
Before proceeding further, check which DNS Server is the fastest for you.
How to Change DNS Server on Windows 10
To change the DNS server on Windows, head over to the Settings app and follow these steps:

- Open Settings -> Network & Internet
- Click on Ethernet (or WiFi, depending on what you’re using) on the left bar.
- Select your connection.

- Under “IP Settings”, click the Edit button and select Manual in the drop-down menu.

- Turn on the IPv4 toggle switch.
- Add your Preferred DNS and Alternate DNS addresses and click on Save.
How to Change DNS Server on Mac
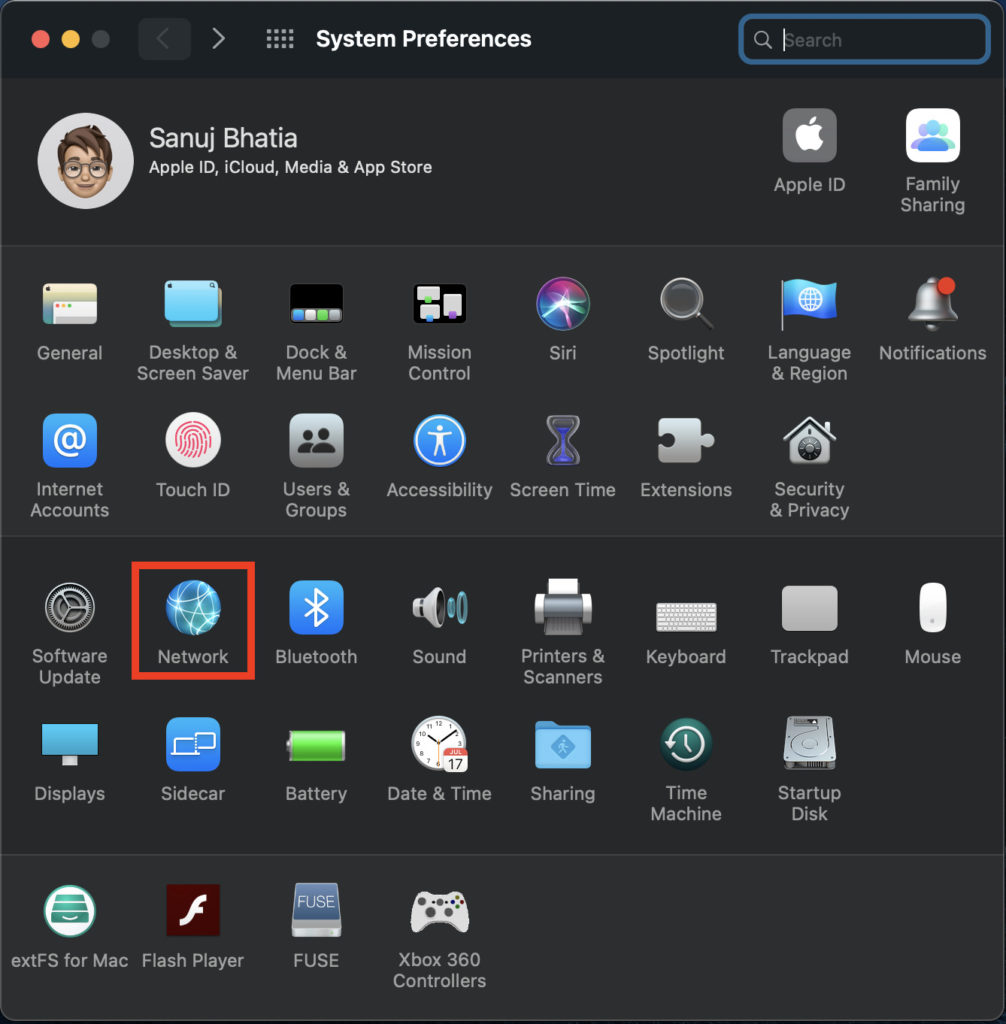
To change the DNS server on macOS, open System Preferences and follow these steps:
- Open the Network section and select your connection from the left pane.
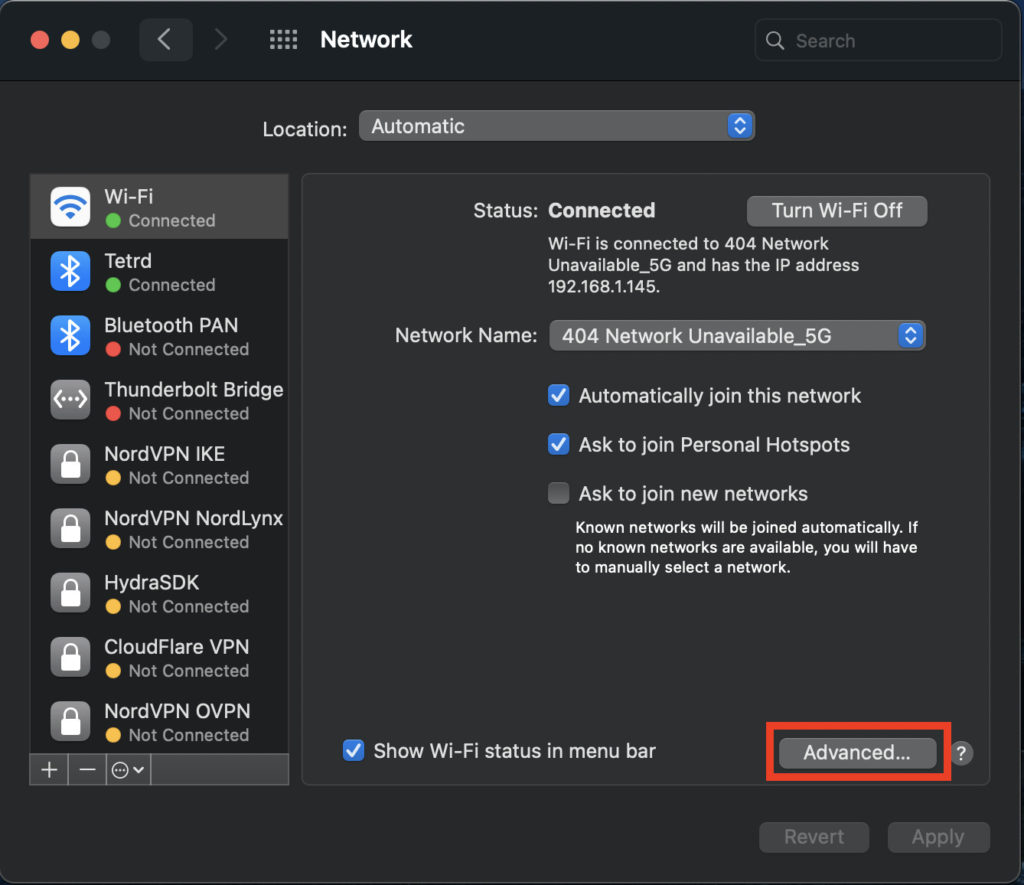
- Click on Advanced.

- Select the DNS tab and click on the Plus button.
- Now add your Primary DNS and Alternate DNS and click on OK.
- Click on Apply and then OK.
How to Change DNS Server on Android
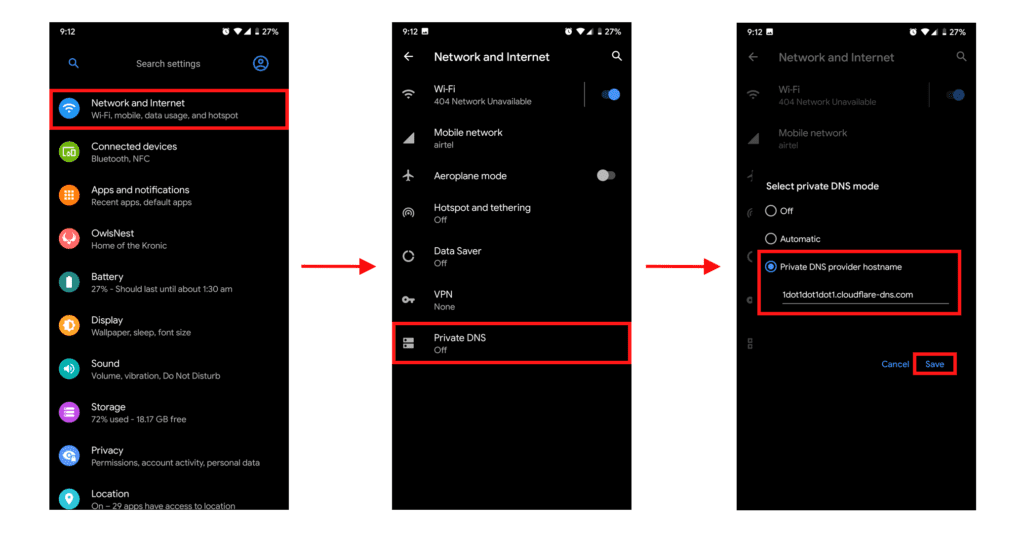
To change DNS Server on Android, follow these steps:
- Head over to Settings -> Select Network Settings (or something similar to it).
- Click on Private DNS and add the server.
- One key thing to note is, on Android, you don’t have to enter numeric DNS Server, you’ll have to add the address like:
- For 1.1.1.1: http://1dot1dot1dot1.cloudflare-dns.com/
- For Google DNS: https://dns.google
How to Change DNS Server on iOS
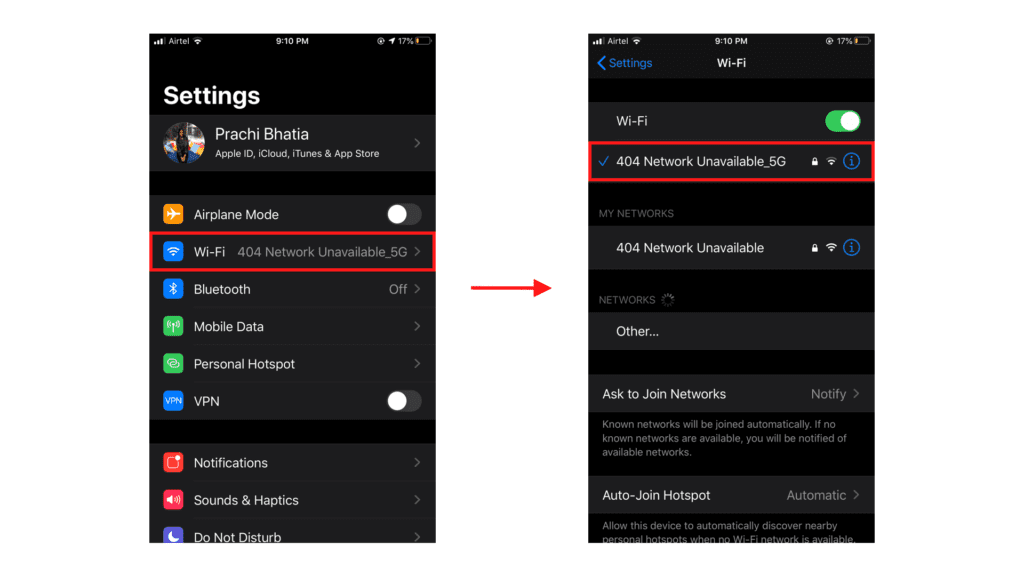
To change DNS server on iOS, follow these steps:
- Open Settings -> Click on WiFi -> Select Your Network (Click the little “i” button in front of it).
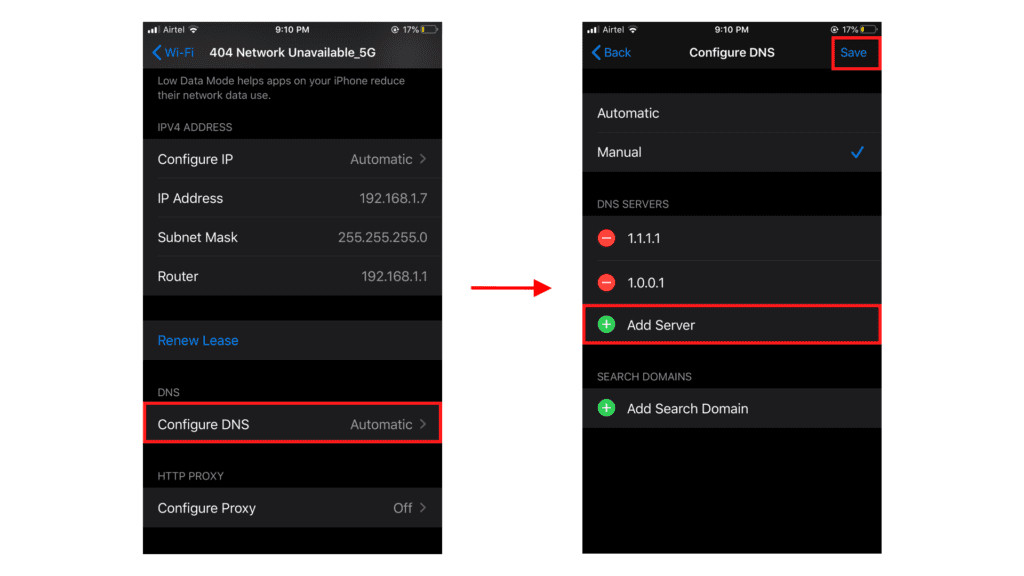
- Click on Configure DNS and add the desired DNS.
- Click on Save!
How to Change DNS Server on WiFi Routers
Change DNS on Huawei Routers:
- Log in to the Huawei Router Configuration page by entering the following IP into your URL bar: 192.168.100.1. The default login is:
- Username: Admin
- Password: Admin
- Navigate to LAN > DHCP Server Configuration
- Check ‘Enable primary DHCP server’
- Check Enable DHCP L2Relay (May be labeled as just DHCP Relay)
- Enter the desired DNS server address. Click on Save and reboot the router.
Change DNS on TP-Link routers:
- Log in to the TP-Link Router Configuration page by entering the following IP into your URL bar: 192.168.100.1. The default login is:
- Username: Admin
- Password: Admin
- Click on Network on the left side panel
- Under Network, you want to select WAN.
- Check “Use these DNS Servers” and add the desired servers.
- Click on Save and reboot the router.
Change DNS on D-Link routers:
- Log in to the D-Link Router Configuration page by entering the following IP into your URL bar: 192.168.100.1. The default login is:
- Username: Admin
- Password: Admin
- Click on the Manual Internet Connection Setup button at the bottom.
- Enter the Primary and Secondary DNS Servers, click on Save and reboot the device.
Let us know in the comments if your Router isn’t listed, we’ll add your specific device!
Also Read: An Easy Way to do DNS Speed Test on your PC.
Thank you Sanuj for the very informative and step by step instruction on how to change DNS server properly. Jonathan fromhttps://redbytesite.com
Thanks Jonathan!
You can also try this app to easily change DNS settings on Android: https://play.google.com/store/apps/details?id=com.mobitomb.autoeasydnschanger